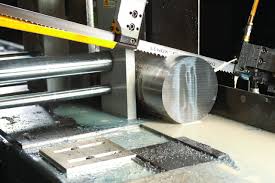
 No one can deny that the blades of band saw will wear out no matter how good cutting technique you use, no matter properly you maintain your band saw. Even you have chosen the best band saw with best blade after checking a huge list of band saw review or whatever you do, you cannot prevent the blades from wearing out. Therefore, it’s necessary for us to replace a new band saw blade for the used band saw after a period of time.
However, changing a band saw blade seem not an easy task for all of us especially for the new one. Thus in this article, we will show you some basic steps on how to replace your band saw blades. Step 1 - Getting ready to the task It is not easy for anyone to repair the band saw blades and it is also never a good idea. When there is any problem with your blades such as cracking, missing teeth, or low sharpness, it’s better for you to replace them with new ones. However, there is some things that you should keep in mind when performing this task. Firstly, as you know, thanks to being coiled up tightly, it’s safe to handle the new band saw blades. Nevertheless, when opening the blades, it can tend to suddenly slip freely or cut you. To prevent this problem, it’s extremely necessary for all of us to wear the eye protection, gloves, long pants and long sleeved shirt to be fully covered. In addition, you should hold the blades and cut the ties together to stop them from opening. Importantly, please remember to throw the blade outside and make sure that you’re far away from it. Also, don’t touch the blades when it is uncoiling or else it will hurt you. Please put the safety as the top priority whenever you do anything. Step 2 - Preparing the saw before the task In the second step and a very important one, you need to prepare the band saw to ready for the mission. First of all, don’t forget to turn off your band saw and cut off any power sources connected to it. After that, you need to gain access to the old blade then you can replace it. Secondly, you need to loosen both the blade guides of the band saw. And now, you can use the tension wheel to release the tension of the old blade then remove it safely. After that, the old blade should be rolled into a coil and tied up to prevent any issue. Step 3 - Replacing the blade of your band saw At the end of step 2, your band saw is ready for us to install the new blade. To replacing the new one, firstly, you need to hold it in place by using the guide bearings of the band saw as you tighten the tension. You need to keep holding until the saw blade is in place properly. After it’s hard enough, you can fully tighten the new blade in the band saw. After all the steps above, you can have your band saw back to the first status and get it ready to use. However, your band saw should be checked and the blade guides should be readjusted to be useful as the beginning. Step 4 – Checking the performance of new blade and finish the mission Well, at the end of the day, you have changed the blade in your band saw. However, you still need to check plug it in and test its performance to make sure that it works well. For example, if the new blade is vibrating, you need to increase the tension to stop this problem. Moreover, the old band saw also should be disposed properly in case it may cause any bad problem. Here are some basic steps and notes for you when replacing your band saw blades. Hopefully, after this article, there is no difficulty for you with this task anymore.
0 Comments
Leave a Reply. |
AuthorI love working and writing. This small blog is the place I'll share some of experience with you
Archives
October 2016
Categories |
 RSS Feed
